Mass Calibration / Check
Select Context → Tune at the top left of the MassHunter window.
Turn on the
QTOFby clicking the On button in its section of the MassHunter window.Close the valve near the
ESIon theMS.Set Calibrant Bottle to B at the bottom left of the Tune window.
Set LC Flow to to Waste at the bottom left of the Tune window.
In the Tune & Calibration tab (pictured below) set the instrument parameters required for the run, e.g.:
- Positive – if using +ESI
- TOF - <when would you use both?>
- Mass Calibration / Check
- 50-1500 m/z
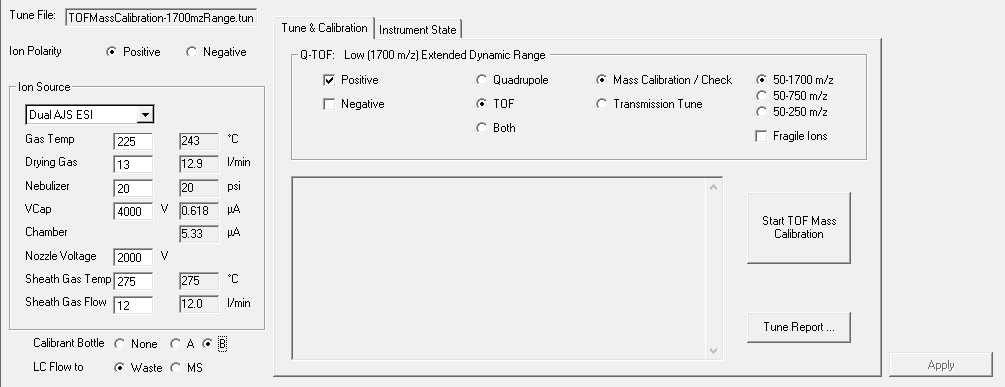
The Tune & Calibration tab
From Agilent’s manual:
Before you calibrate the instrument, you have to set the instrument state
to the proper instrument mode, mass range and fast polarity switching
mode. You set these values on the Instrument State tab.

When you change the mass range or enable/disable fast polarity switching
on the Instrument State tab, the pulser frequency is changed which results
in the DEI pulser warming up or cooling down. If the calibration is
performed too soon, the DEI may still be heating up or cooling down which
can result in drift. See the online Help for more information on the
Instrument State tab.
Click the button to start the calibration.
Note
The text of this button veries depending on the mode selected.
- For Quadrupole, the button reads Start Check Quadrupole
- For TOF, the button reads Start TOF Mass Calibration
- For Both, the button reads Start Check Quadrupole & TOF Mass Calibration
Once complete, the calibration report will open automatically.
Under TOF Mass Calibration Data, for the largest mass check that the resolution is at least 20,000 and that the corrected residuals is below 5 ppm.
On Page 2 of the report, under Detector → MCP, check that the value is below 900.
Back in MassHunter, return to Acquisition mode by selecting Context → Acquisition at the top left of the window.
Open the valve near the
ESIon theMS.